WEEK
FIVE
3D Scanning and Printing
Task for this Week
Group Assignment
Test the design rules for your 3D printerIndividual Assignment
Design and 3D print an object (small, few cm3, limited by printer time) that could not be made subtractively and 3D scan an object.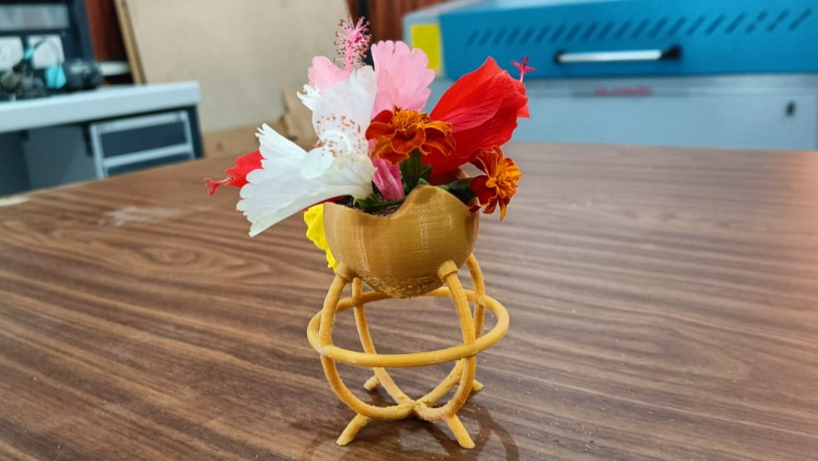
This week we have to check our 3d printer parameter in other way we can say to check its ability, this is for our group assignment.
In indivisual assignment we have to create a design which is not possible by subtractive methodes and scannining of an object. Before going to do test,
firstly we have to know about what is 3d printing why we used it?
What is 3D printing
3D printing is a additive manufacturing process in which we formed a three dimensional obejct by using a material. this material may be in powder form ormay be in wire form. Basically they are used for rapid prototyping, Robotics industries etc. The machine which is do 3D prnting is known as 3D printer.
Basically 3D printer is a device that turns any design into three dimensional object. Also used for checking design parameters. so whenever we designed
somethingbefore mass production or a single production we have to check our or design in 3d printing then after printing if design is ok then we can process
the design for next operation.
Types of 3D printers
There are many types of 3D printing.1.Stereolithography (SLA)
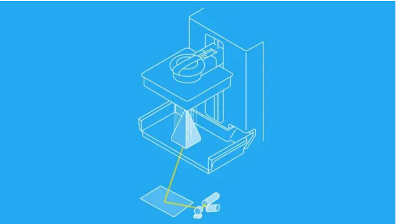
This is the first 3D printing technology. In this, a laser is fired over the resin, which hardens its resin.The process of converting resin into hard plastic
is called photopolymerization. In this 3D printing technique, we get surface finish and fine details very well.
2.Selective Laser Sintering (SLS)
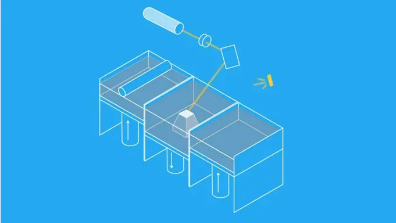
In this technology, we run the laser over the polymer powder, so that it converts into solid.Nylon is used a lot in this because its mechanical properties are
very good. Mainly used for functional prortyping and custom manufacturing.
3.Fused Deposition Modeling (FDM) or Fused filament Fabrication (FFF)
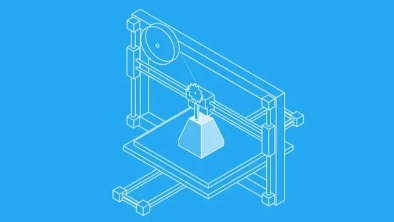
This type of printer is widely used. It consists of a filament which melts in the nozzle and a layer by layer object formed. This printer is used more because it
is cheap and the process in it is easy. the material we used in this type of printer is PLA (Poly Lactic Acid) and ABS (Acrylonitrile Butadiene Styrene) Its accuracy
and surface fishing is less than other 3d printing technique. We have this type of printer in our lab. we used PLA material for printing.
Printer Details
We have a printer which works on FFF techniques. This printer consist a fillament , controlling system, nozzle and bed. Filament is a raw material for the printingprocess and we use PLA as a filament. PLA (PolyLactic Acid) is a type of polymer which is biodegradable. The nozzle temperature for PLA is about 220 Degree
celcius. Nozzle melt the fillamnet by heating them and turn it into istrechable wire. Nozzle moves along with our design. Bed provide support to printing
Object by which it can not move. The bed is also heating and in the case of PLA material its temperature goes upto 70 degree celcius. Control panel all this
parameter and raed the file give instrunction to every machine part to print that file.
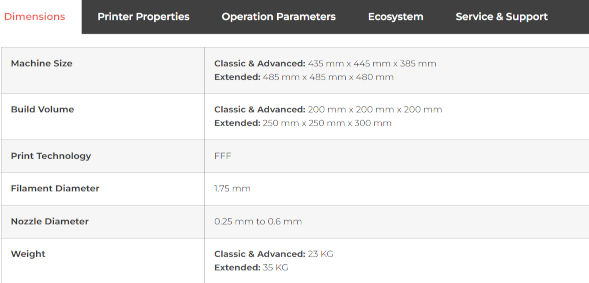
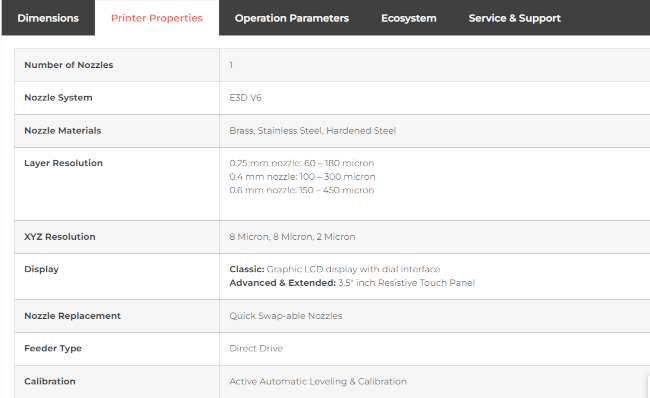
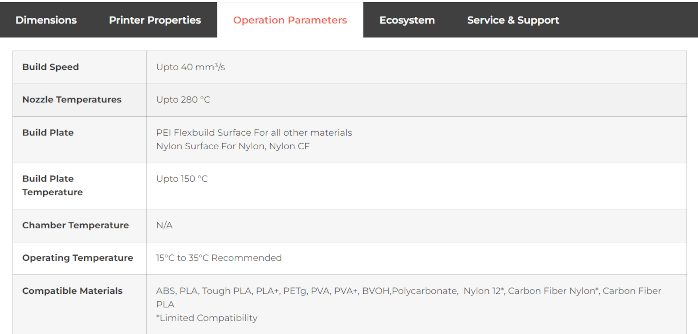
Other Specifiaction

Group Assignment
In group assignment we have to check some parameter of 3D printer by printing diffrenet types of designs in it and then we measure them and then we studythe printing part. We check the all parameter of that part. For this test we use the file which is provided in Fabacademy and some file we design
By this task we identify the parameter of our printer means our printer can over hang a object or in which minimun thickness is able to print.
The printing object dimension must be equal to the design file . We get some tolerance but much more. So a perfect printer is that which pass all
this test. Second after this tests we able to find the point where our printer not giving the good result. So next time we design according to it.
We print the file for Overhanging, Bridging, Printing Wall thickness, Dimension, Surface Finish, Anistrophy and infill. Some of the Test result
Given Below.
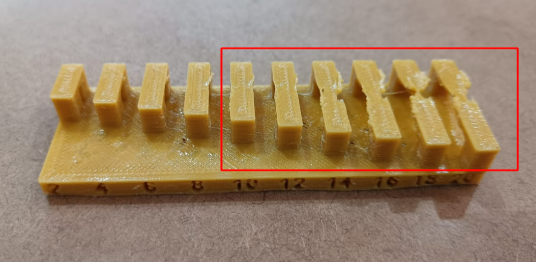
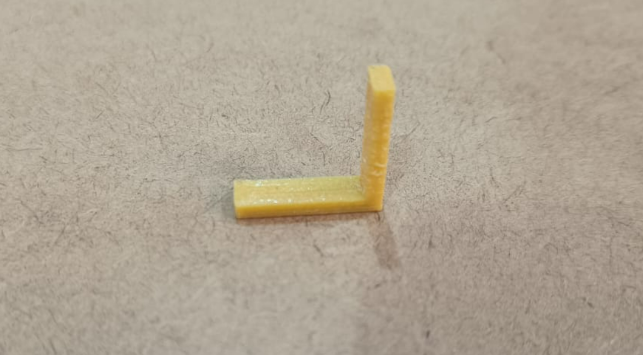
1.Overhanging
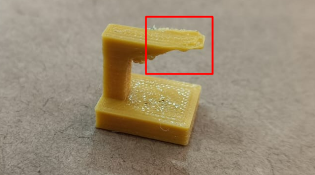
In this test I found that the about 10 to 12 mm the hanging side is good but after that it going upward and finising was not good.
we can over hang the layer upto 15 mm.
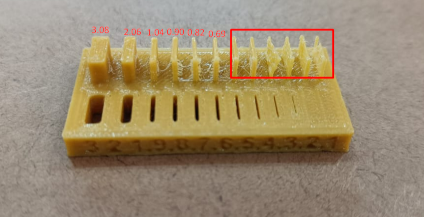
2.Bridging
In this Test I found that upto 10 mm the upper layer surface was fine but when distance increasing between two poles, bridging get affected
and not so good. So the priter is able to Print the 10mm lenght bridging pattern.
3.Wall Thickness
When I measure the wall thickness I found some tolerance in each wall no one is perfect. no wall is perfect. the tolerance is not
so big. And it also depend on the nozzle size. We are using 0.4mm nozzle size , So wall thickness less than 0.4 are not printed good
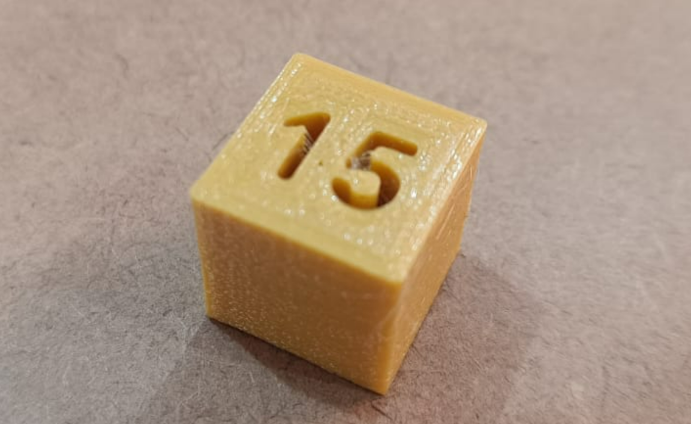
4.Dimensions
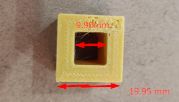
dimension is the main parameter for printer to show its accuracy. We print a block of square. Dimensions are perfectly fine with negligible tolerance.
5.Surface finish
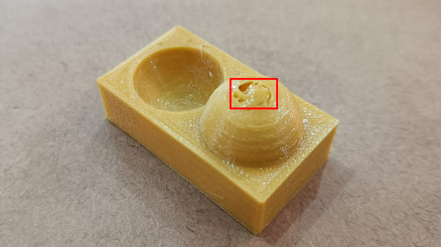
Both internal and External surfaces are good but I noticed a problem here. At external sphere surface I get a hole type structure in it. Then again
print it. Again I get the same problem. I realise that It is due to the more fillament extrusion from the nozzle and it movement of nozzle taken in small
area. And due to weight it collapse.
6.Anistrophy
This test is passed successfully. Here we we have to check the printer print the verticallly part correctly or not.
7.Infill
Infill means the printer cover the hollow part by printing some pattern design. The value of infill can be changed. More infill , More strong print object.
This test is good and my printer pass this test.
click here to read more about group assignment.
Individual Assignment
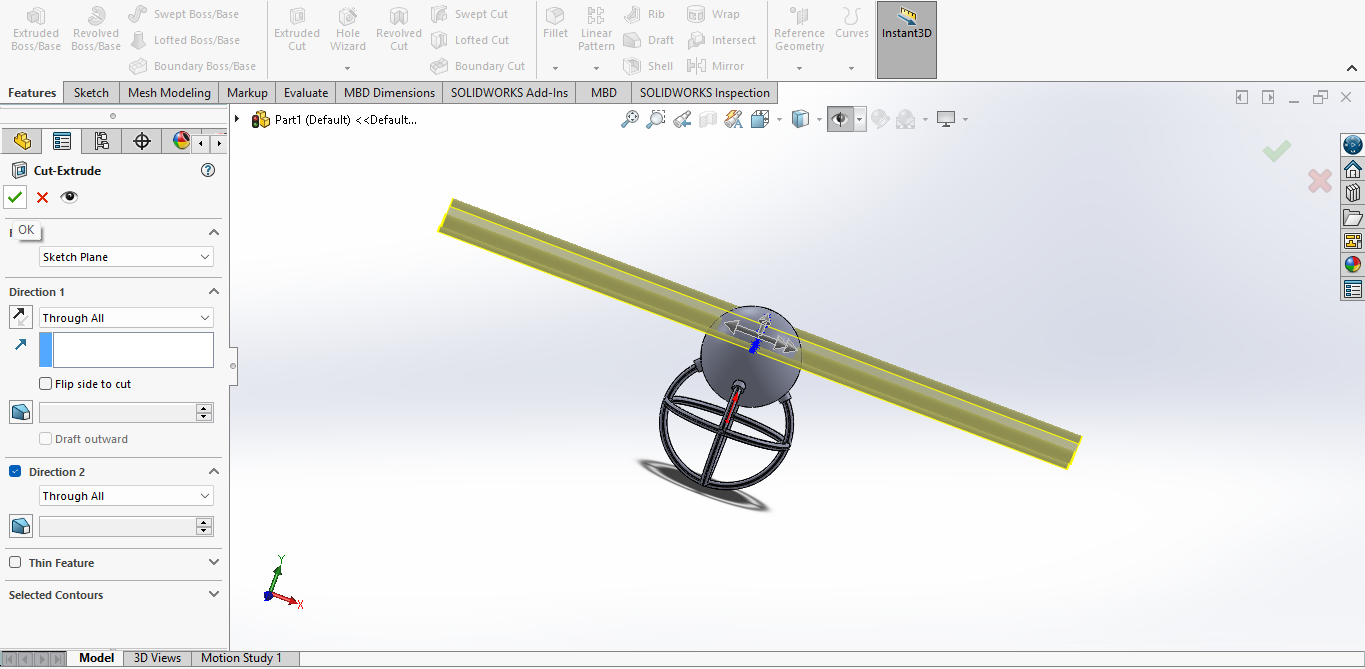
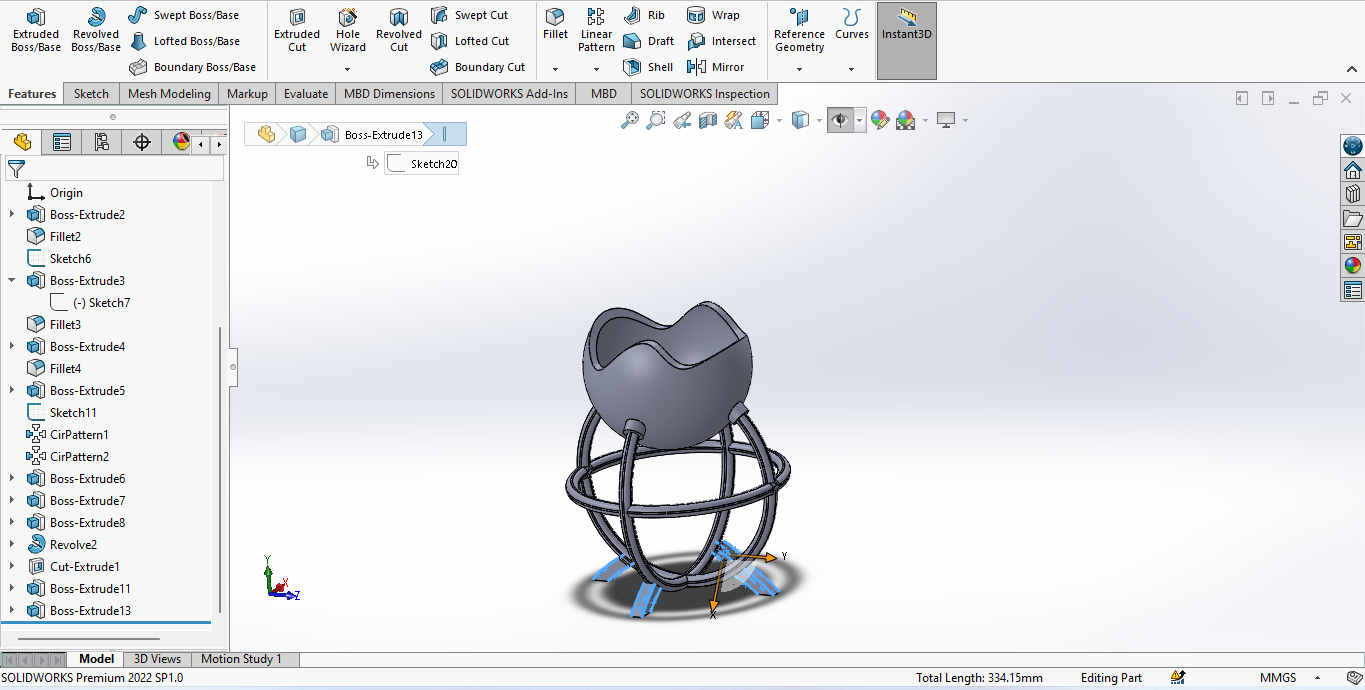
I have design something which is not posiibly made by subtractive methods. So I start designing in solid works. I decided to make a mini table flower pot. Fordesign I chose solidworks and make a sketch then extrude it.
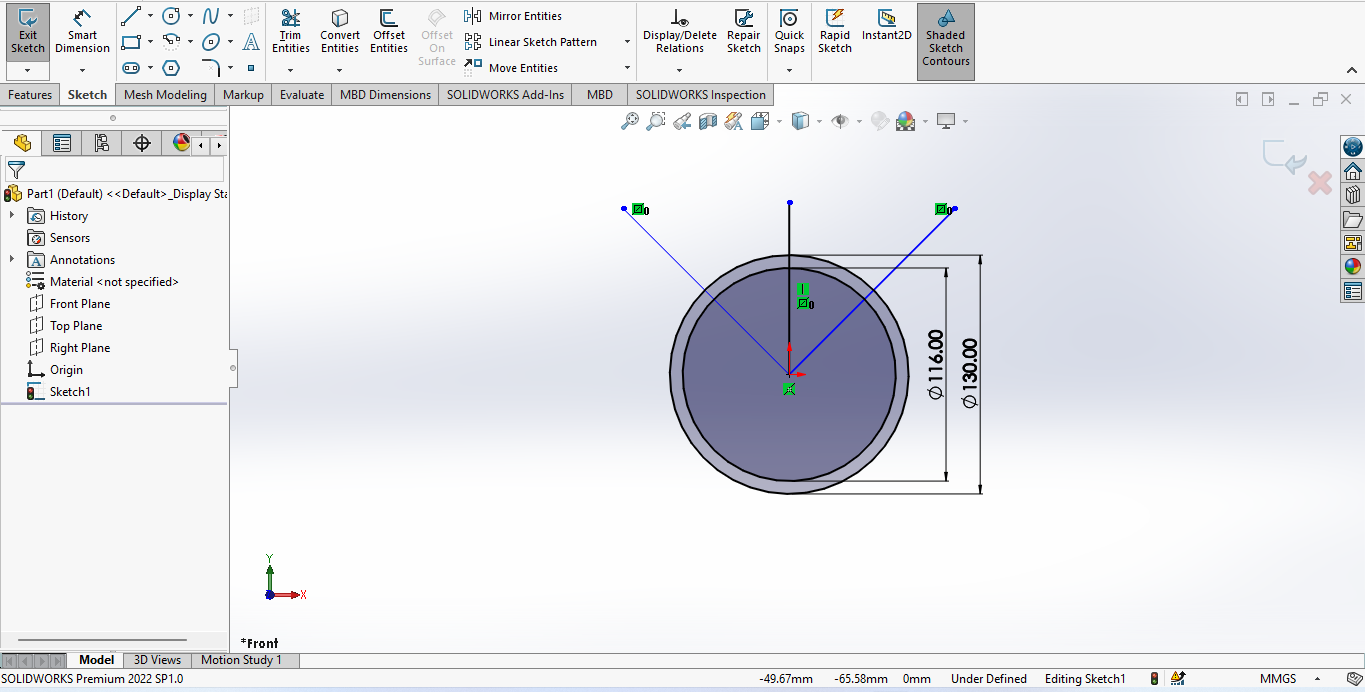
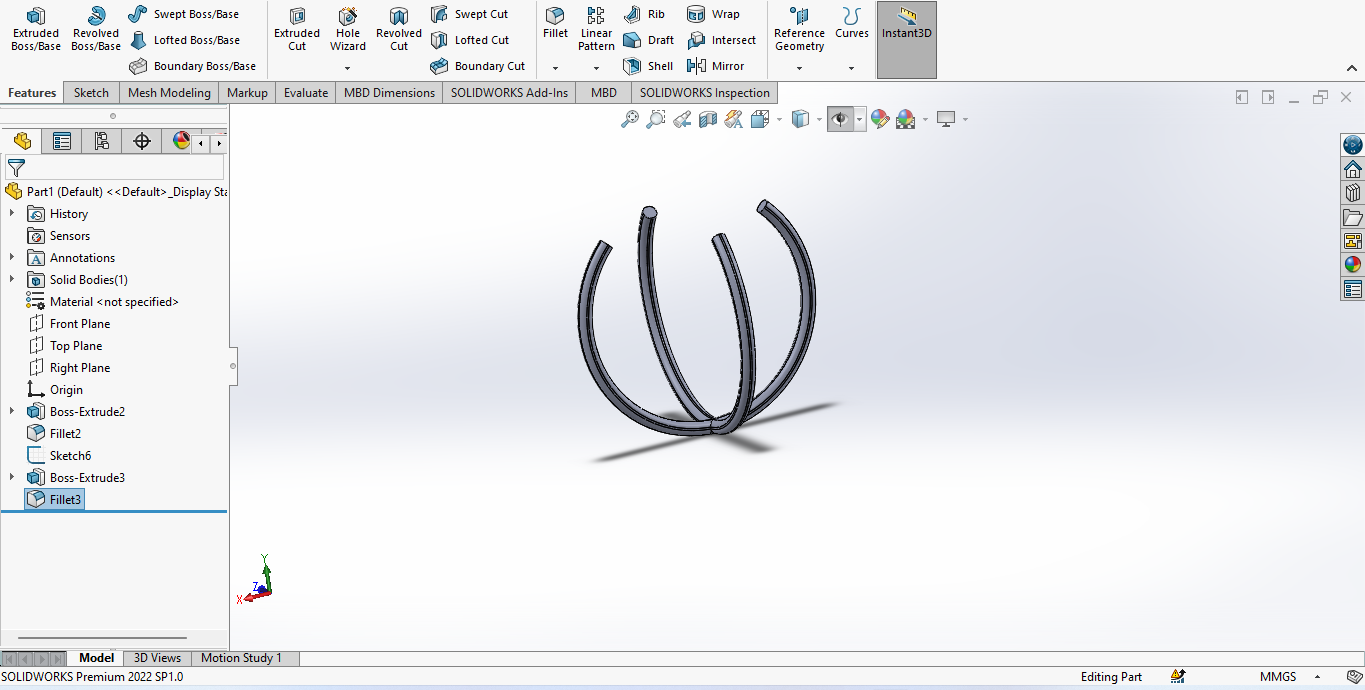
After extruding I used fillet commond to make its corner round. Then I selected another plane and make same sketch follow The same process. then I create
a bowl structure and cut its upper part. In last I craeted its bottom supported which make it stable on table.
After completetion of the design I save the file in STL formate. Because our printer support STL formate. Now,No machine can understand direct design.
To understand it, we have to write that design in its language. The same happens with 3D printer, we have to prepare a gcode file containing the design for
the machine, which contains all the instructions for the machine. For our 3D printer we are using Frcatory named software and I open the design file in it.
Then follow this following step-
• Step 1- Open the designed file in software
• Step 2- Select the object and rotate it if it is not in correct position
• Step 3- Move if necessary
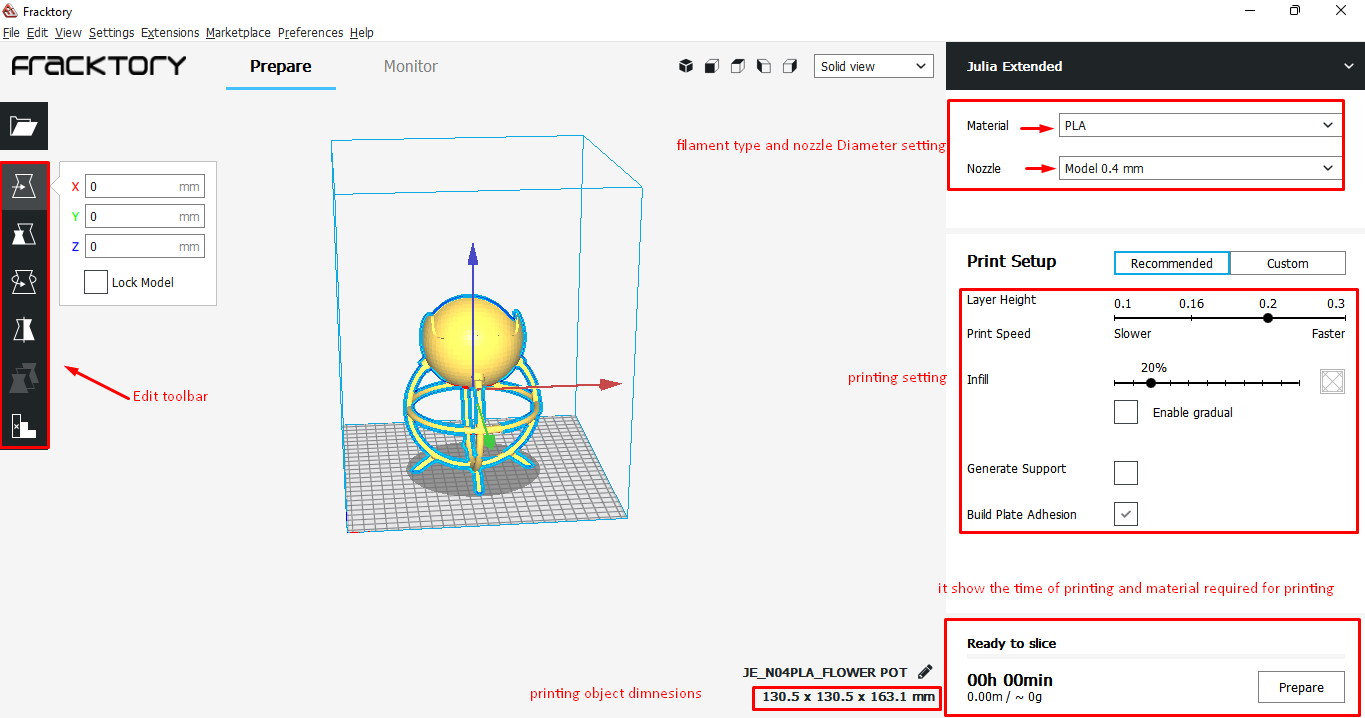
• Step 4- Scalling - This is the most important for our designed. In my case i designed the file of size 130.49mm*130.49mm*163.0928 mm.
So I rudeced the size of designed by 50% and then printing time reduced .
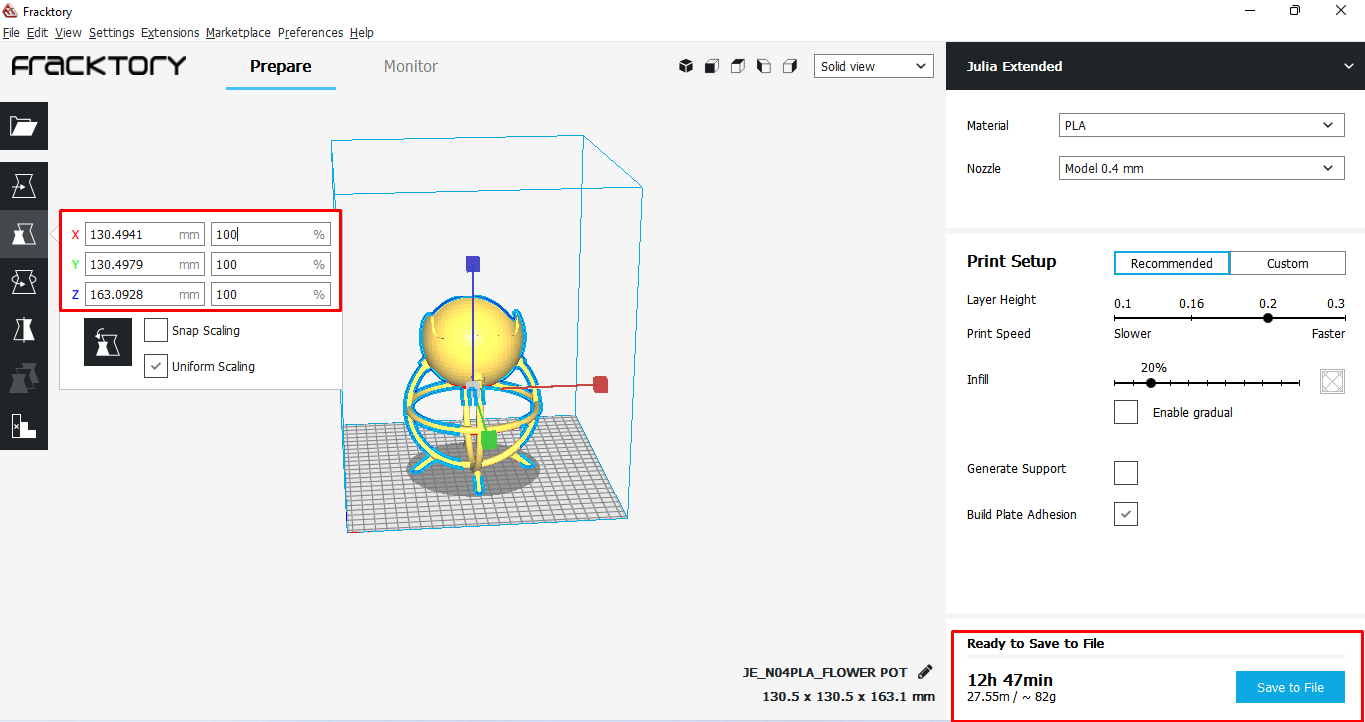
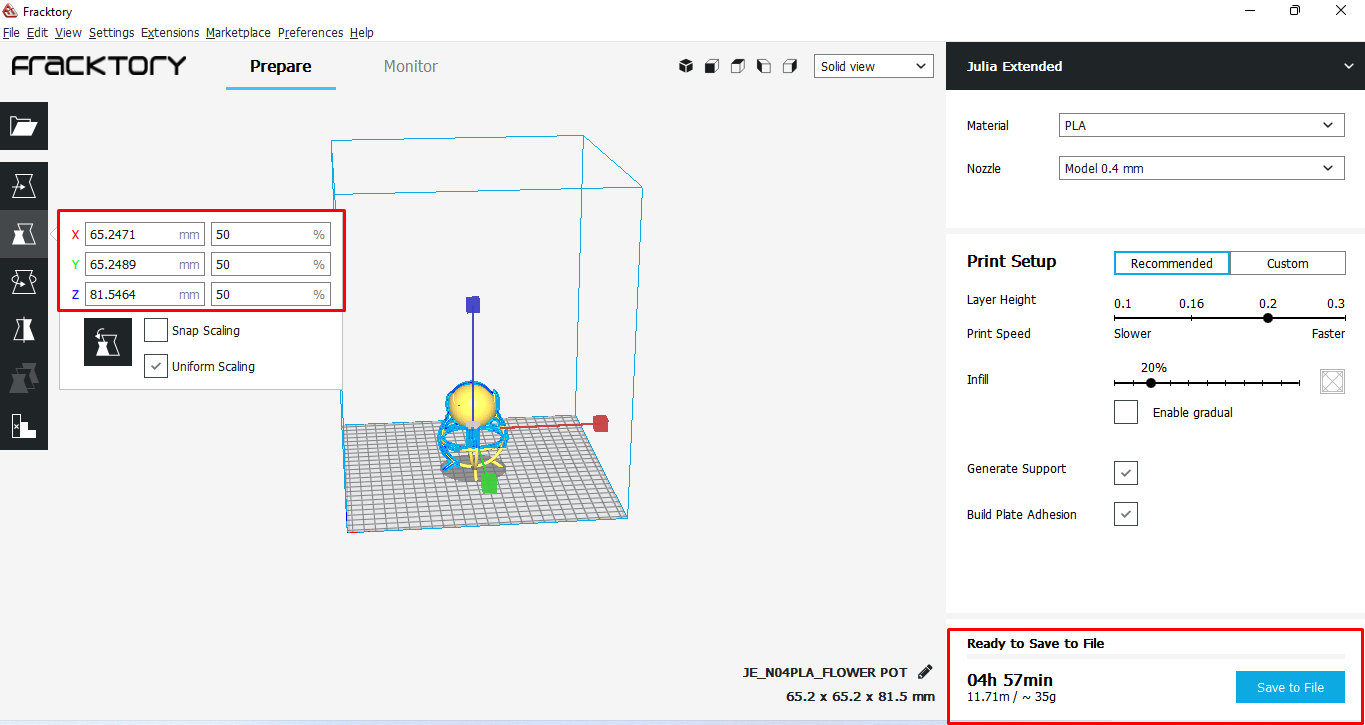
• Step 5- Then go to printing setup and select parameter like suppoer, infill and layer height.
• Support - It help in hanging design my providing a support from bottom. This support is breakable and we can easily remove it.
• Infill - When we have to make solid object then the printer fill the inside area of object . Here I used 20% infill so it cover only
20 % part of total space. If we make it 100% its density increases and the strength and printing time also increase.
•Layer Height- This is also a very important for printing. By increasing layer height we can reduce our printing time but the quality
and finishing is alo not good. So I set my printer layer height by 0.2 mm for better quality.
• Step 6- Then save the file and open it in 3d Printer .
I rotate the file to to reduce support but the printing time is increases.
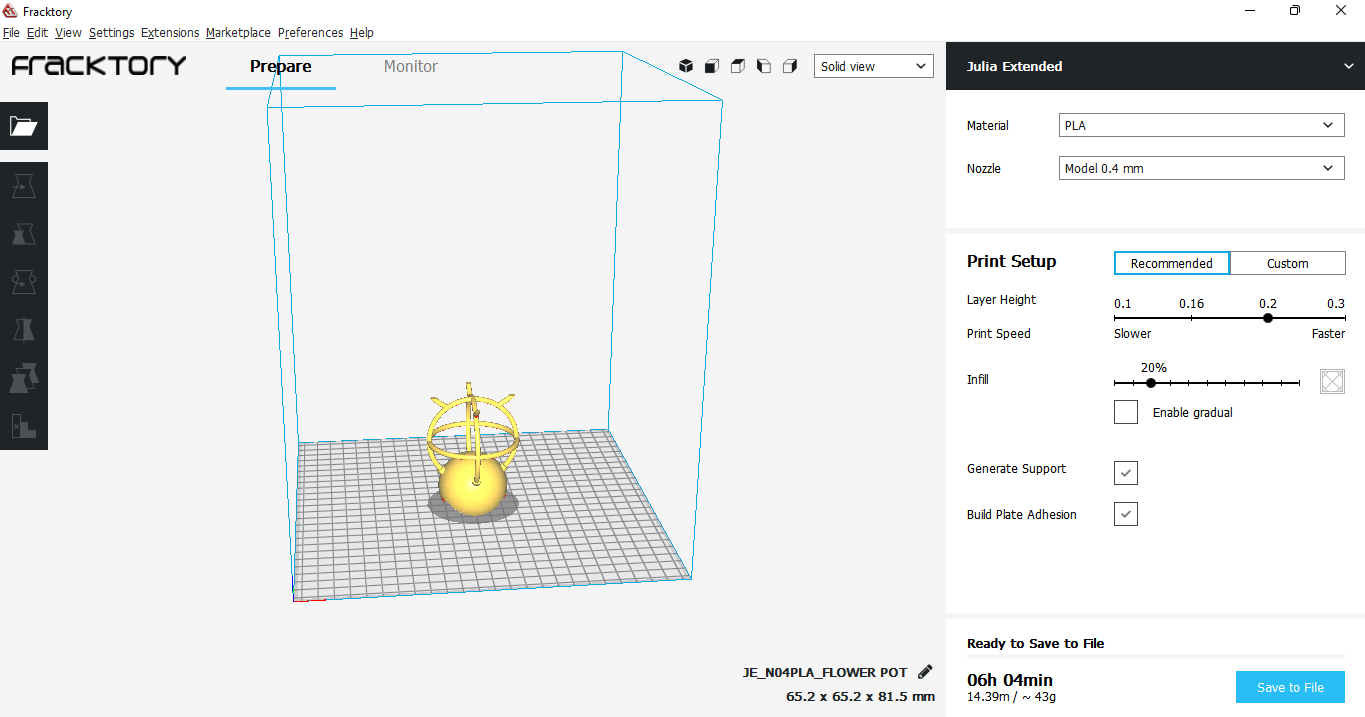
After that I saved the file in my pendrive.
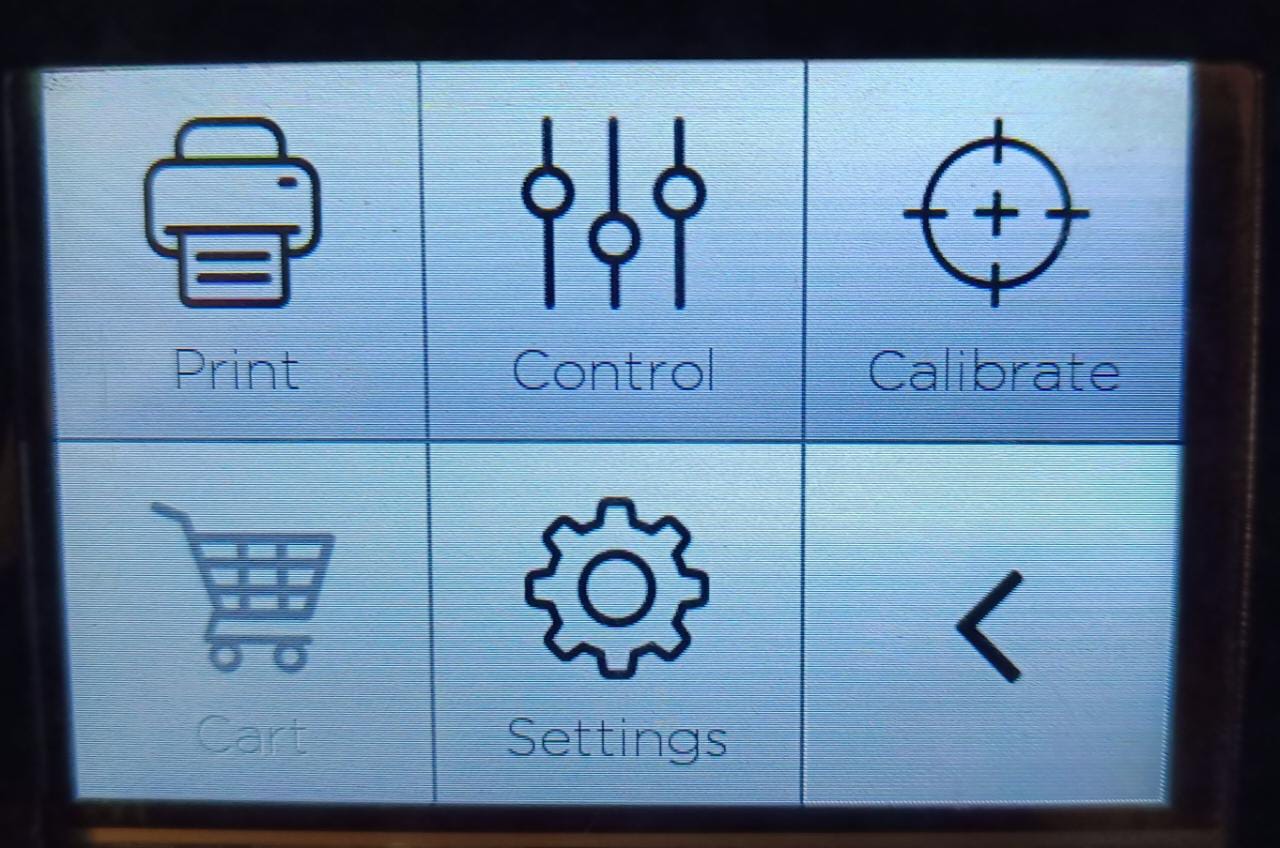
Now I insert the pendrive in Machine and when we start the printer The first window is appeared which contains the menu of print, Control, Calibration,
setting etc.
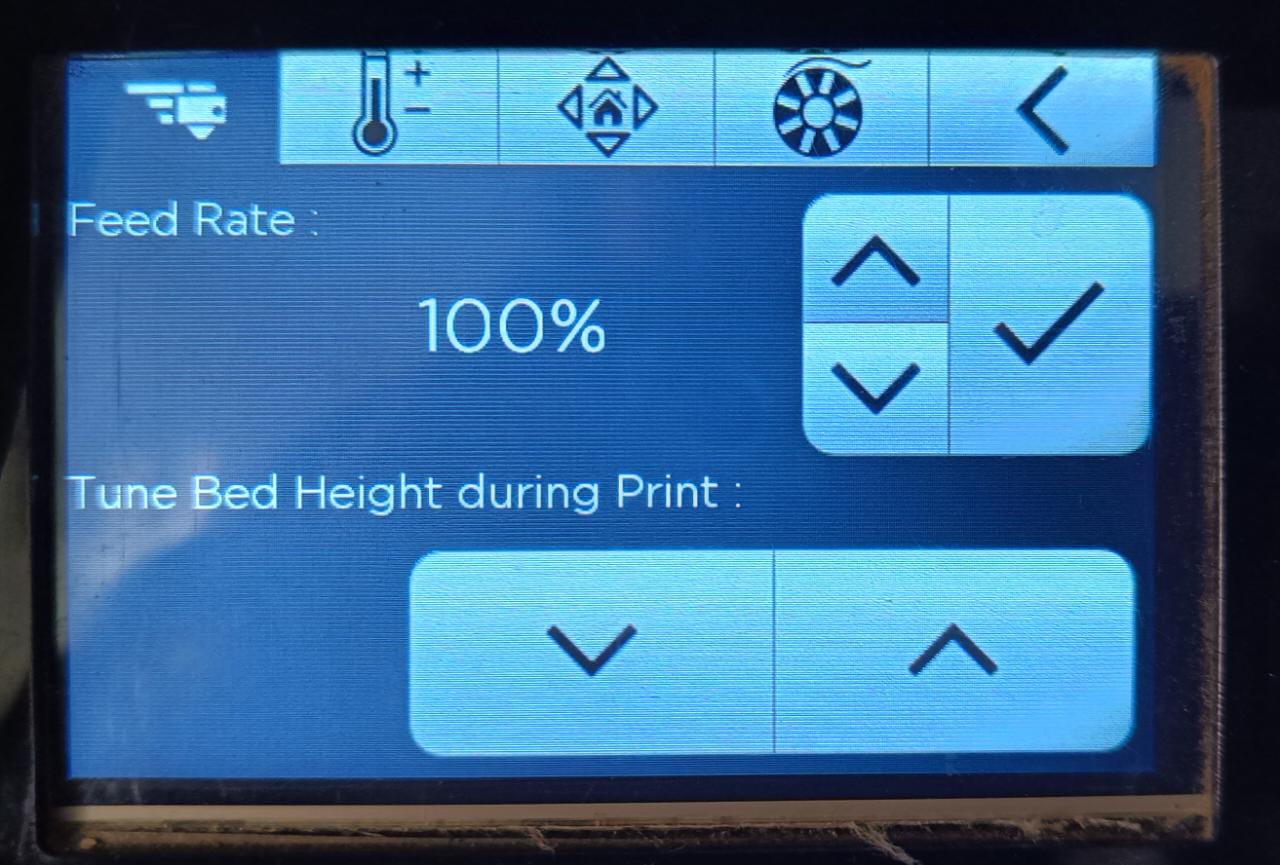
When we click on control option a new window is open which show the menu to control temperature, fillament change and feed rate
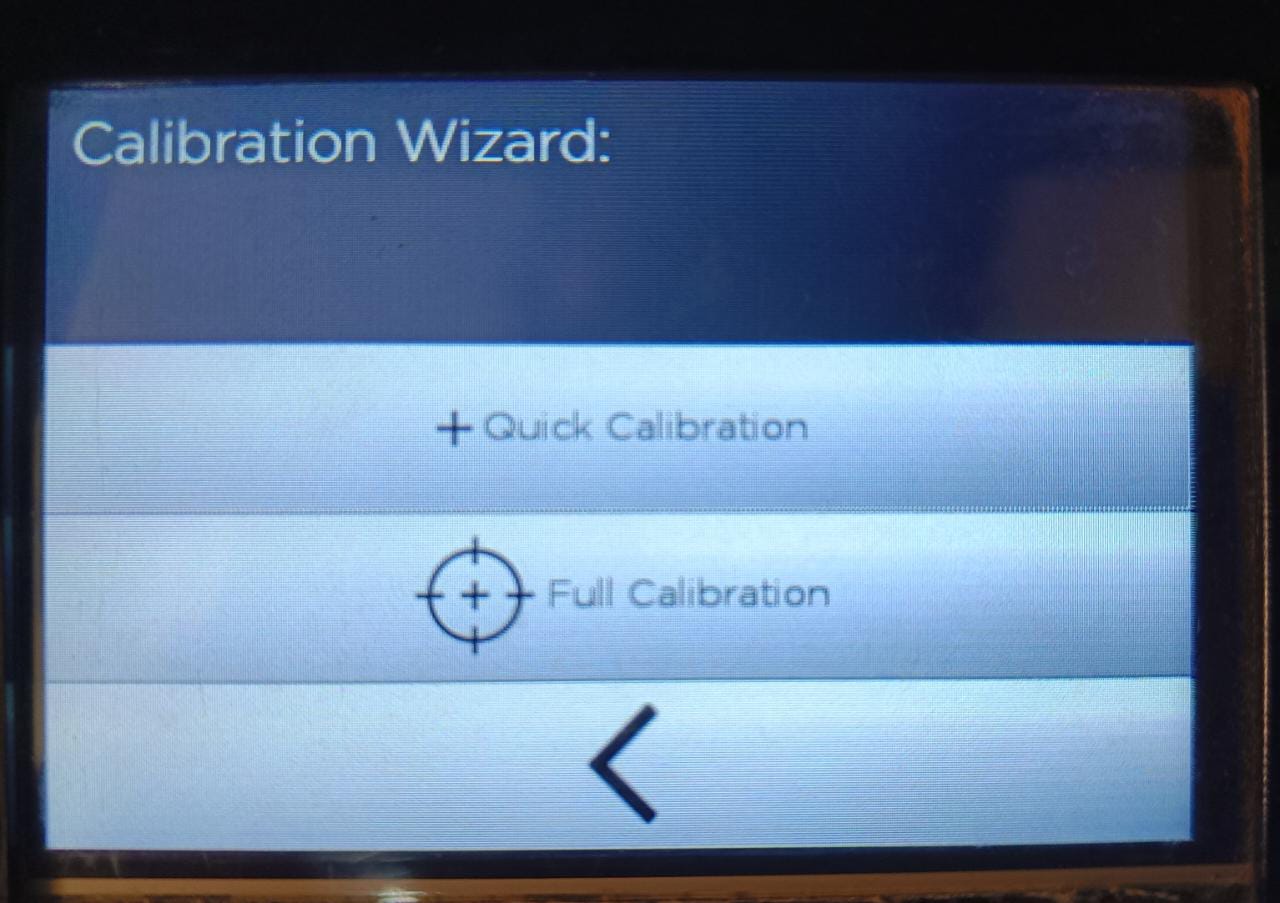
This is the window for bed calibration. we have to do that manually or machine also do calibration automatically before the printing. So in that we adjust
the bed level to just close to nozzle to get uniform bootom layer of the file or object.
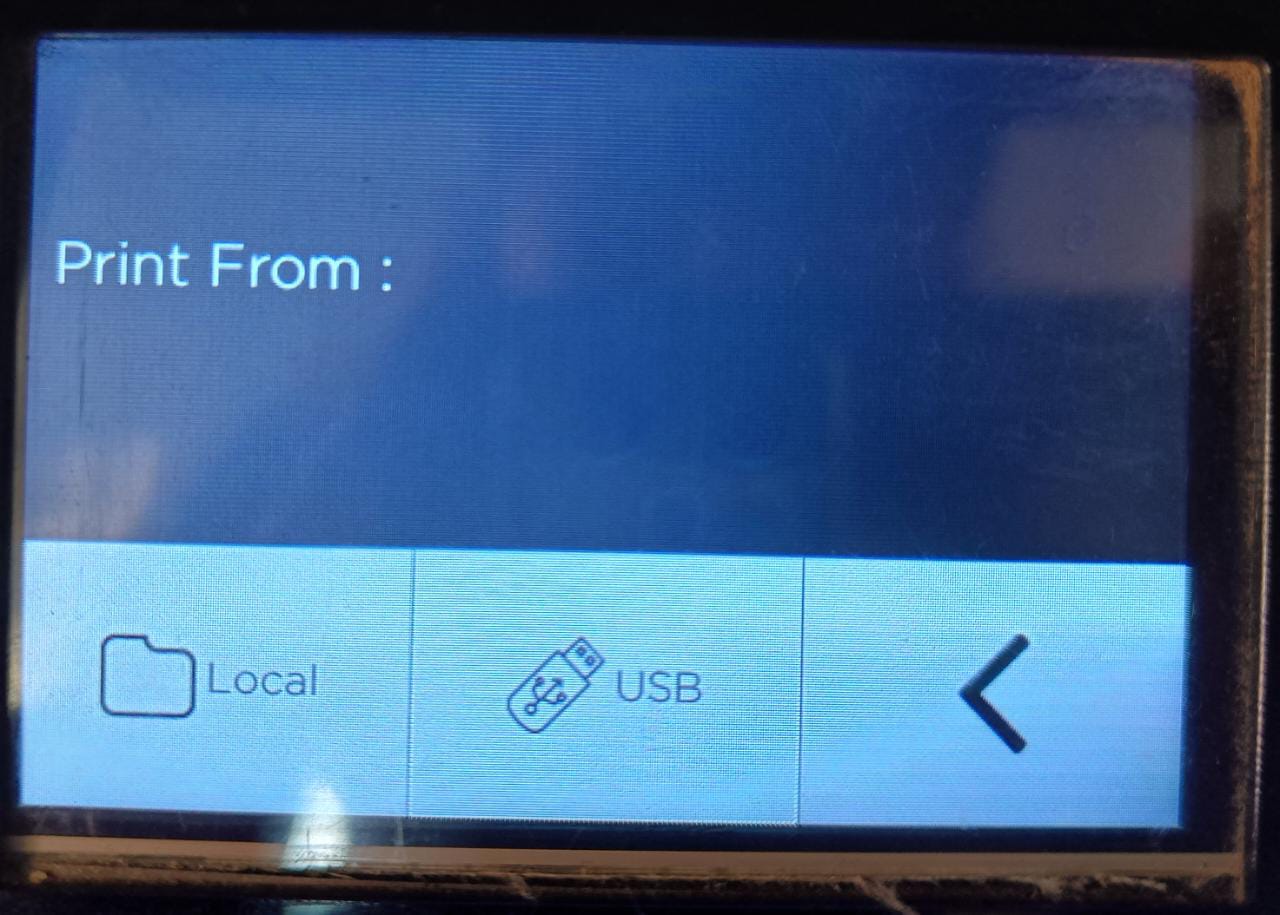
After that Go to the print option and then select USB and then select the file and start print.
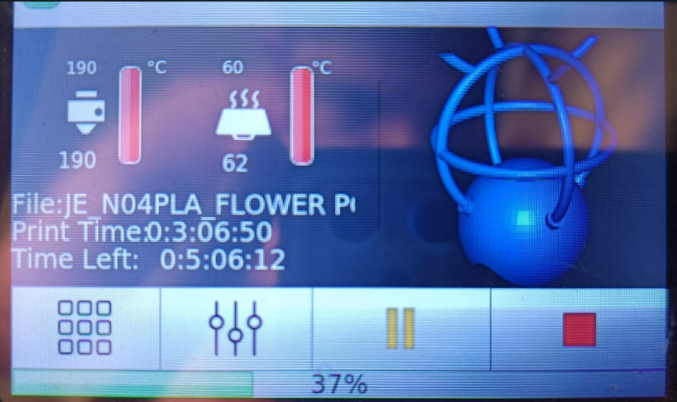
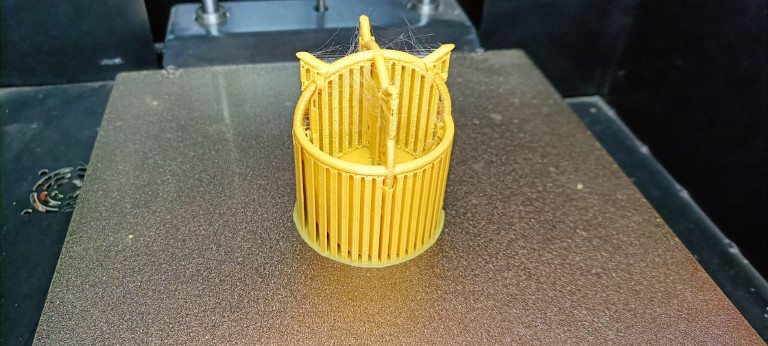
The below image show the my printing process and time for the printing the design file.
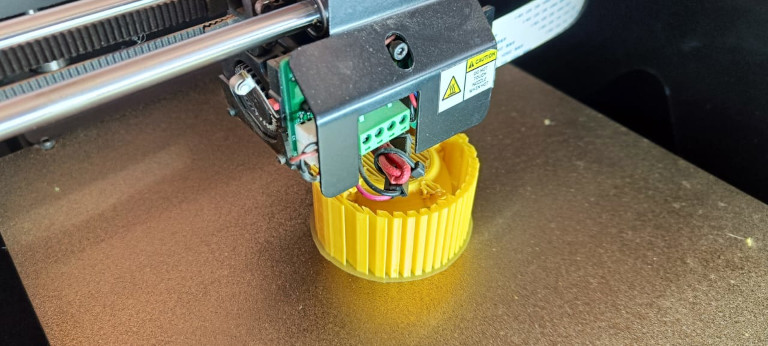
Printing process- here we see the support craeted by printer for hanging part.
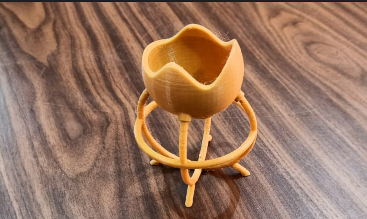
Final Result
After fully print i removed the suppoet part and the final result is shown in the below images.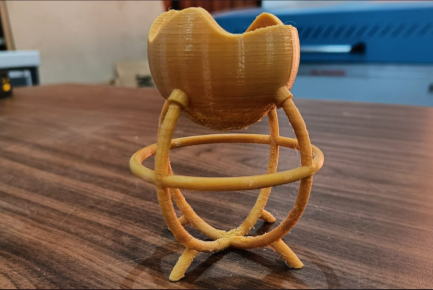
3D Scanning
Scanning is the process by which we can scan a 3D object and create its 3D design file and we can print it. This is also used for scanning Face ,body any type of3D objects. This is also used for the scanning of historical building .
Techniques of 3D scanning
• Laser traingulation- In this type of technique we use a laser lights which go on the scanning object and reflect. The sensor sense the reflectionand make calculation to form a 3D object.
• Photogrammetry- In this technology , we cant convert an image into 3D object. This technology came used in mobile application to scanning a image.
Contact based 3D scanning technology- In this we make some point on the object then measure the distance between point and sensor and according to
this it create a 3D file.
• Laser pulses- Here the laser beam are used to scanning. the laser beam reflect back and sensed by the sensor. Just like Ultrasonic sensor. then after
calculation of distance it create a 3D file.
Reference
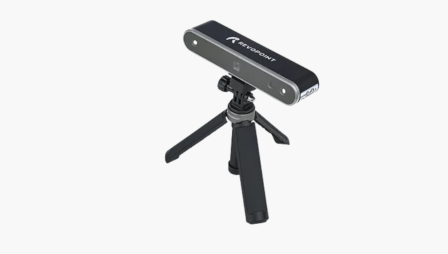
We have a Revopoint company 3D scanner. Which work on the IR camera which capture a 3d image of the object. The RGB camera help to find the color of the
bject
Scanner Details
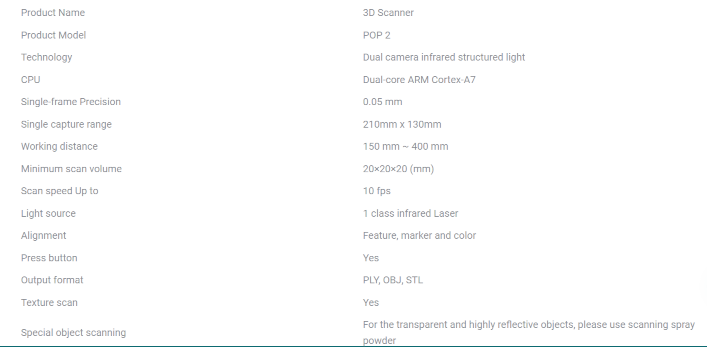
Click here to know more about it.
Uses
They are used in They are mainly used for scanning of human parts, medical application equipments, buildings and gadgets. After scanning we print them in 3Dprinter .In medical industries the bones of human scanned and printed in 3D printer and then this prited bone are fitted in human body.
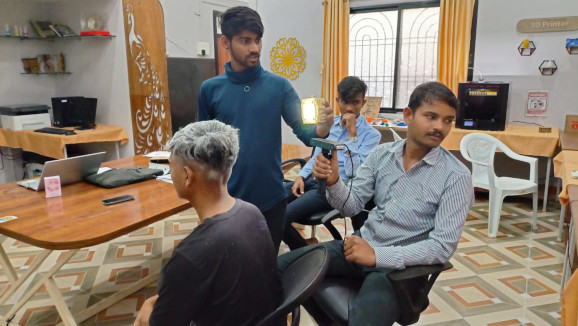
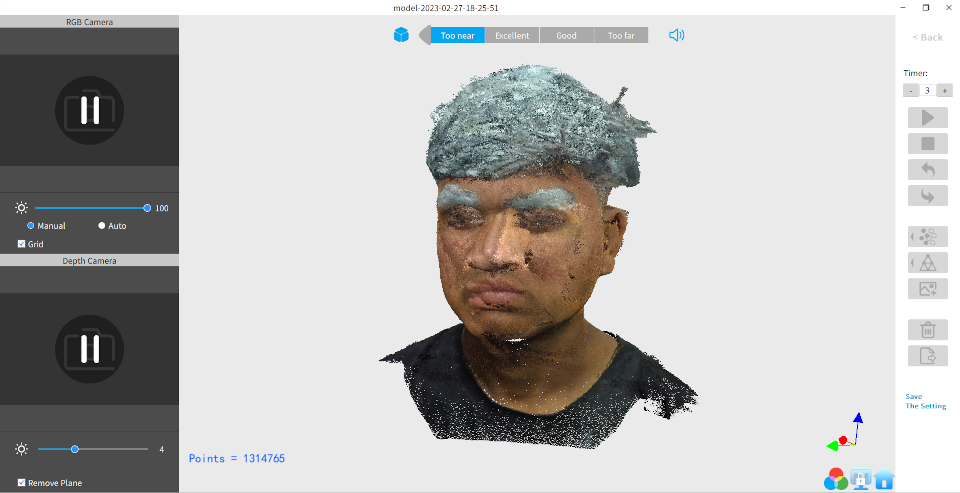
scanning Process
Now I have to decided to scan the full head of my Student Ajay baghel.So we complete the setup and start scanning. Our scanner does not detect the black color.When we scan the object it calculate the frame. After completion of scanning it covert those frame into number of points. After that we mesh those point to form
single frame 3D object.
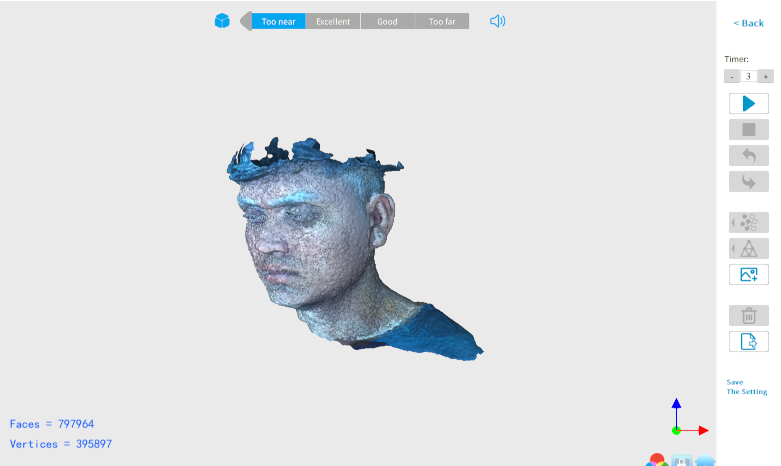
we spread the powder on hair and then scan again and then finally we scan the full head successfully.
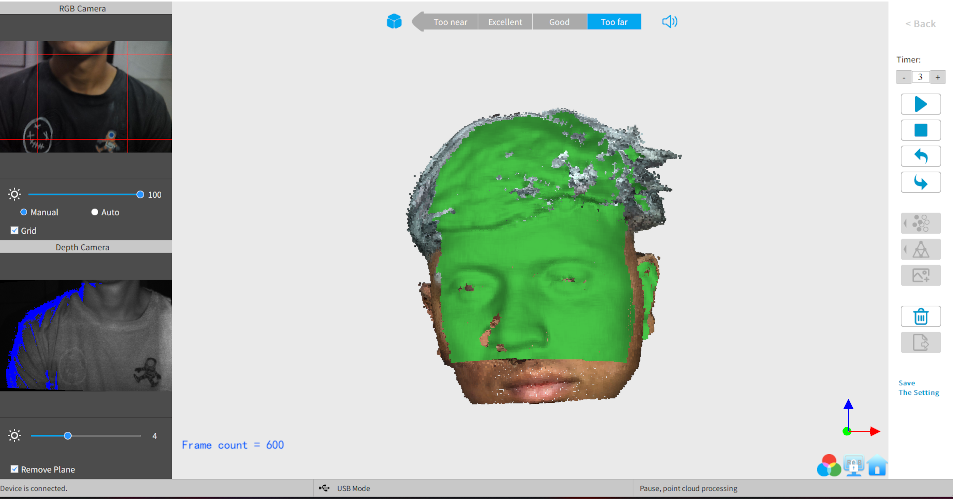
After scanning our frames are converted into some small points and then we have to mesh those point and our final object is ready then we can save in stl file and print It.
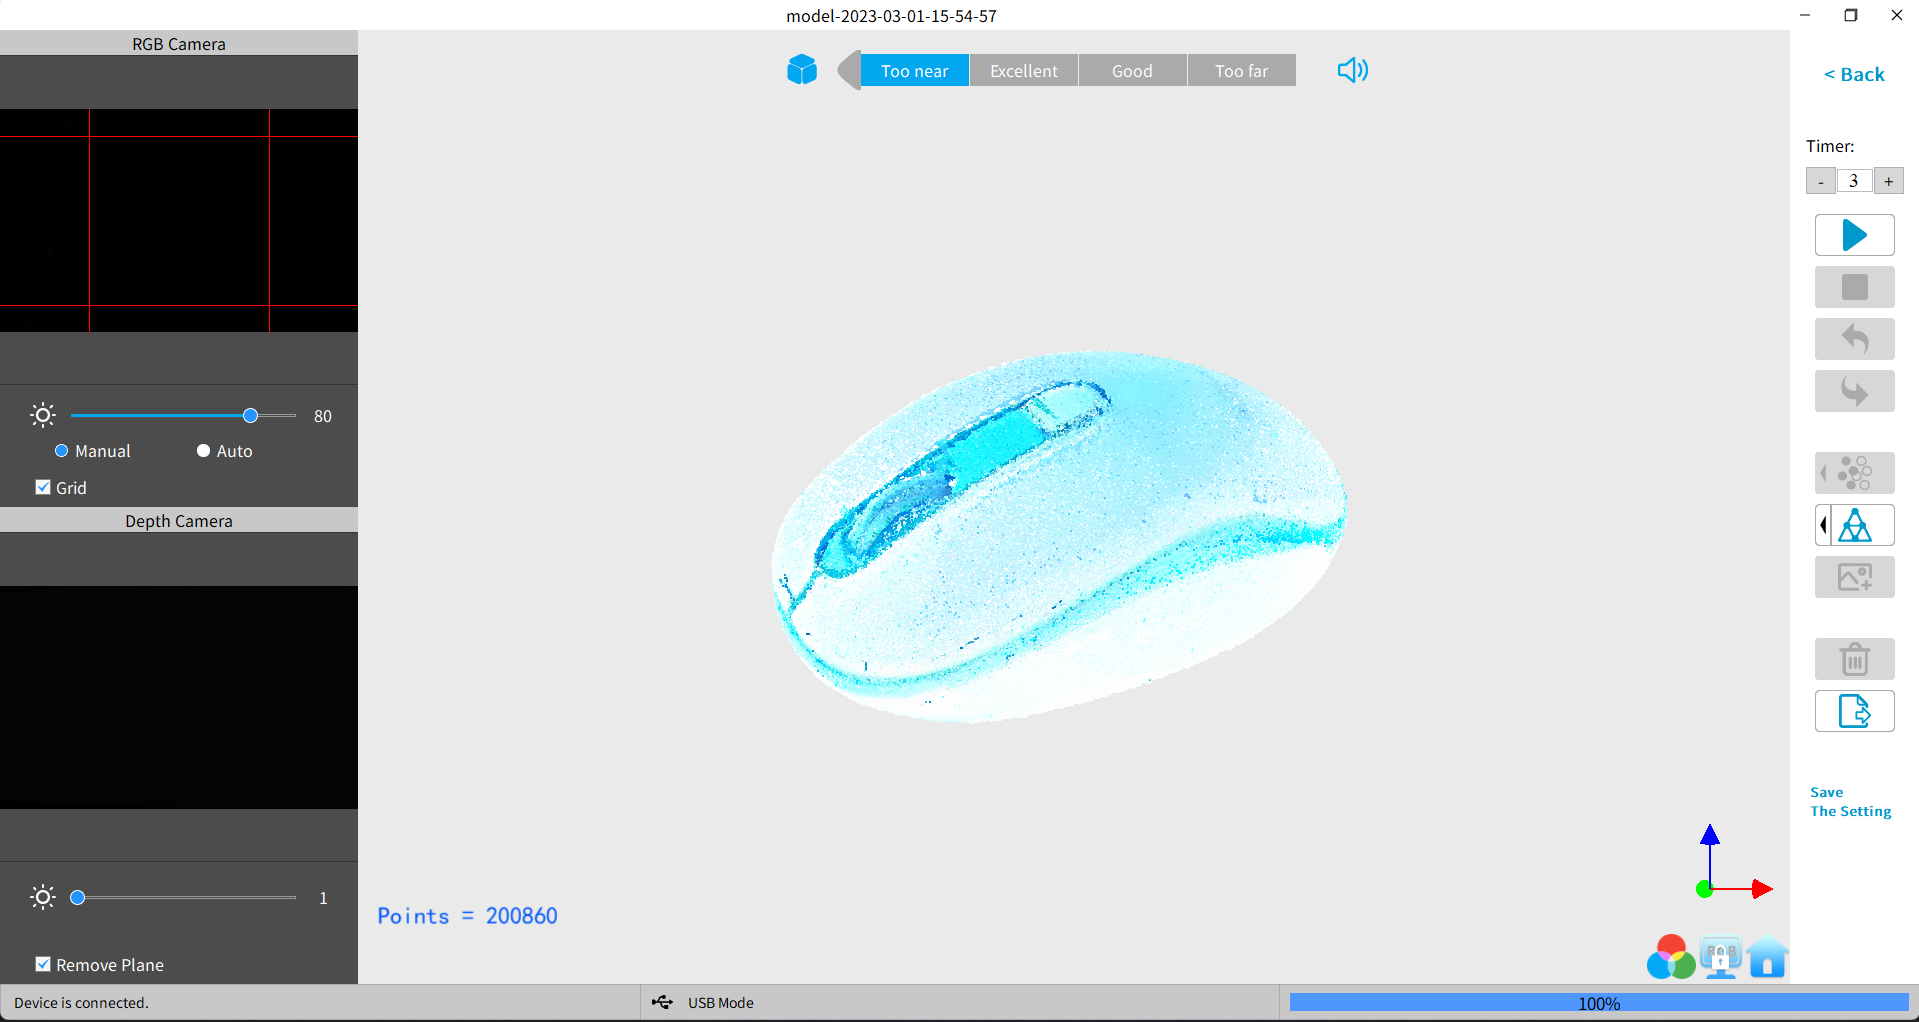
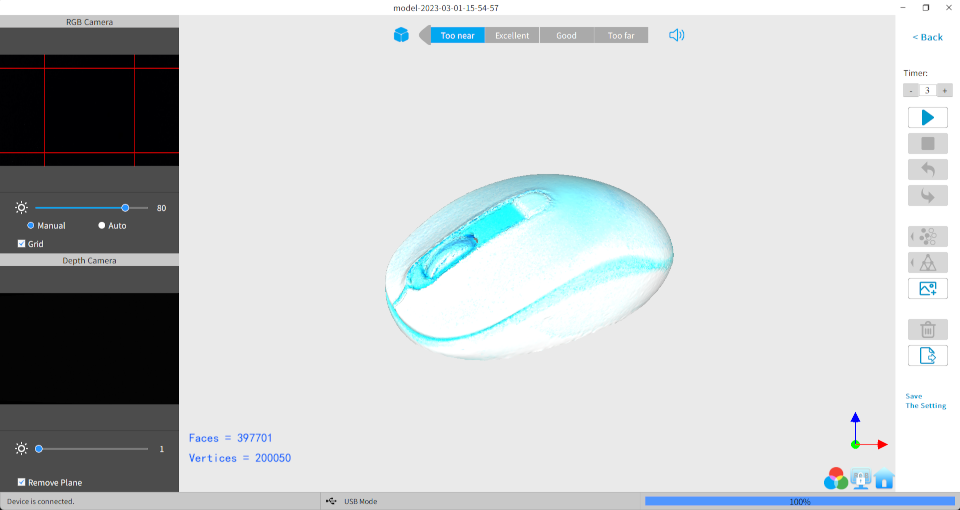
Then we decided to scan another object, so this time we chose the computer mouse.
Learning Outcomes
-I learned about the 3D printing technologies-I learned about how to use 3d printer and how to set the file in Its software
-I learned about how to scane the object by using 3d scanning device
what went wrong
-At the time of 3D scanning its loss track because my hand shaking they are not stable. So its quite difficult for me scane a object.More about group Assignment
Download Original files
Flower pot FileScanning file